
Anyone looking to retrofit a historic villa for energy efficiency must balance several objectives. The architecture should retain its unique character. Sensitive structural elements must be protected. At the same time, expectations regarding comfort, energy efficiency, and technical reliability are rising. One-size-fits-all solutions rarely meet these demands.
The correct sequence, therefore, does not begin with a new heating system. It begins with a thorough analysis of the existing conditions and clearly defined preservation goals. Only once the building’s design, use, building physics, and regulatory framework are known can viable measures be developed. The following steps show how owners of a historic or landmark-protected villa can proceed in a structured manner.
Planning and Analysis of the Current Situation
1. Define conservation goals and future use
First, identify which elements define the villa’s architectural and historical value. These include more than just the facade and roof shape. Window divisions, hardware, stairwells, wall paneling, parquet flooring, stucco, doors, and distinctive room layouts may also be worthy of preservation.
Supplement these building inventory targets with a realistic usage profile. Is the house occupied year-round? Are there rarely used formal rooms? Should individual floors be heated separately? Will the bathrooms, kitchen, or utility rooms be rearranged? The answers to these questions will influence the heating load, hot water demand, ventilation, and piping layout.
The result should be a coordinated target sheet. It specifies which components must be retained, where reversible modifications are possible, and what level of comfort is actually needed. This establishes a common standard for all future decisions.
2. Form a specialized planning team
Historic buildings require interdisciplinary planning. Hire an architect with proven experience in historic buildings or historic preservation. In addition, you will need a qualified energy consultant, a building physics expert, and specialist designers for heating, ventilation, plumbing, and electrical systems. Depending on the findings, you may also need to consult restorers, structural engineers, or wood preservation specialists.
Responsibilities should be clarified early on. The architect coordinates design, existing structures, and permits. The building physics expert evaluates thermal and moisture performance. The technical planning team designs systems to meet the future needs of the building. Restoration surveys help distinguish original surfaces from later alterations.
Options should not be considered in isolation. A more airtight window affects air exchange. Interior insulation comes into contact with ceiling supports, window reveals, and built-in fixtures. A heat pump may require larger heating surfaces. These are the key areas where conflicting objectives arise.
3. Examine the inventory and document it in a traceable manner
Create a digital or clearly organized building inventory. This should include a record of building components, materials, damage, surfaces, and technical systems. As-built drawings, historical photographs, construction records, and available energy consumption data supplement the documentation. However, energy consumption figures alone are not sufficient; usage, occupancy times, and room temperatures have a significant impact on them.
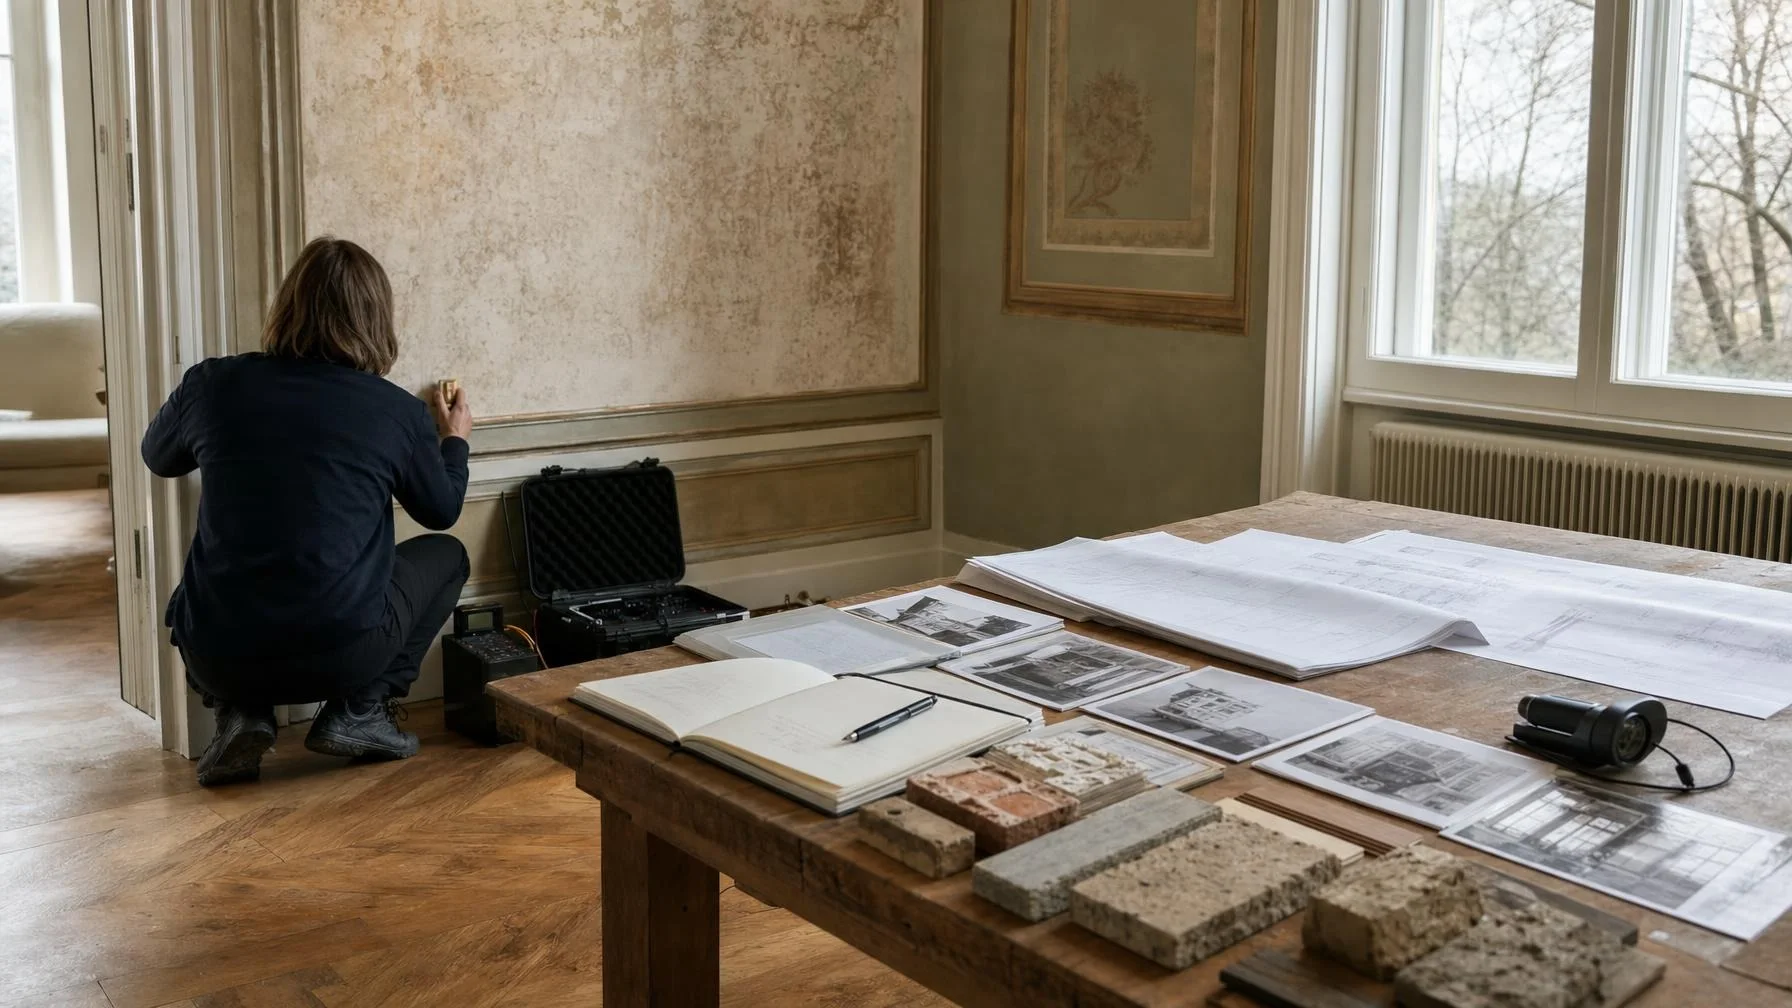
Depending on the property, it may be advisable to conduct moisture measurements, endoscopic inspections, component openings, and examinations of material layers. Under suitable weather conditions, thermography can provide indications of thermal bridges and leaks. The images must be interpreted by a professional. An airtightness test also requires a clearly defined scope of work.
Special attention should be paid to the roof structure, basement, drainage, window flashings, utility routing, and areas where contamination is suspected. Only on this basis can it be determined whether a comfort issue is caused by a lack of insulation, air leaks, moisture, inadequate control systems, or a combination of factors.
4. Clarify Heritage Protection and the Legal Situation Early On
Before beginning the design phase, check whether the villa is listed as a standalone historic monument, is part of a protected complex, or is subject to other design requirements. In Munich, the current historic preservation status and consultation with the relevant authorities are decisive. A preliminary consultation can help narrow down realistic options. However, it does not replace any required permits or building permits.
A search for “renovating a historic villa in Munich” yields numerous results. What matters is not merely experience with historic buildings, but demonstrable expertise in working with protected structures. Changes to facades, windows, roof surfaces, interior spaces, and visible technical systems should be coordinated early on. Photos of the existing structure, detailed drawings, material samples, and a justification based on historic preservation principles are usually more informative than product documentation alone.
The Building Energy Act, the Bavarian Historic Preservation Act, and other public law requirements must also be reviewed on a project-by-project basis. Special regulations may apply to historic buildings. The same applies to funding programs and tax incentives. Guidelines, responsibilities, technical requirements, and deadlines are subject to change. The requirements of the relevant authorities, funding agencies, and tax authorities in effect at the time are binding. Funding applications must be submitted, if applicable, before the project is commissioned or work begins.
Building Envelope and Historic Building Components
5. Prioritize the building envelope based on risk
First, repair any damage that threatens the structure. This includes leaky roofs, defective connections, faulty drainage, and permanently damp structural components. Installing insulation on an untreated substrate can mask damage and hinder the drying process.
Next, determine which areas can be improved without losing their distinctive character. Exterior insulation is often incompatible with a structured historic facade. However, interior insulation is not an automatic substitute. The material, thickness, exposure to driving rain, thermal bridges, and potential for drying out must all be evaluated together.
A common issue arises at window reveals with historic wood cladding. If only the exposed wall surface is insulated, critical edge areas may remain uninsulated. The detailed design must therefore take into account the wall, ceiling supports, reveal, window sill, and built-in elements. Test areas and building physics calculations can help support the decision.
6. Restoring Historic Windows with Care
Evaluate each window based on its construction, condition, and architectural significance. Original casement windows, storm windows, and frames of high craftsmanship should not be judged solely on the basis of their U-value. First, consider repairs, refurbishment of the hardware, replacement of seals, and possible improvements to the glazing.
Depending on the design, additional interior windows or other reversible solutions may be considered. A complete replacement should only be considered after comparing the various options. Factors to consider include thermal insulation, resistance to driving rain, sound insulation, ease of operation, frame appearance, glass reflection, and connection details.
Greater airtightness also requires a well-designed ventilation system. Sealing numerous gaps reduces natural air exchange. This affects moisture removal and indoor climate, especially in bedrooms, kitchens, and bathrooms.
7. Evaluate the roof, top-floor ceiling, and basement separately
When it comes to the roof, the intended use determines the appropriate design. An unheated attic presents different challenges than a finished floor. The structural framework, roofing, connections, underlayment, and existing ventilation levels should be examined. Exposed rafters, historic dormers, and profiled eaves impose design constraints.
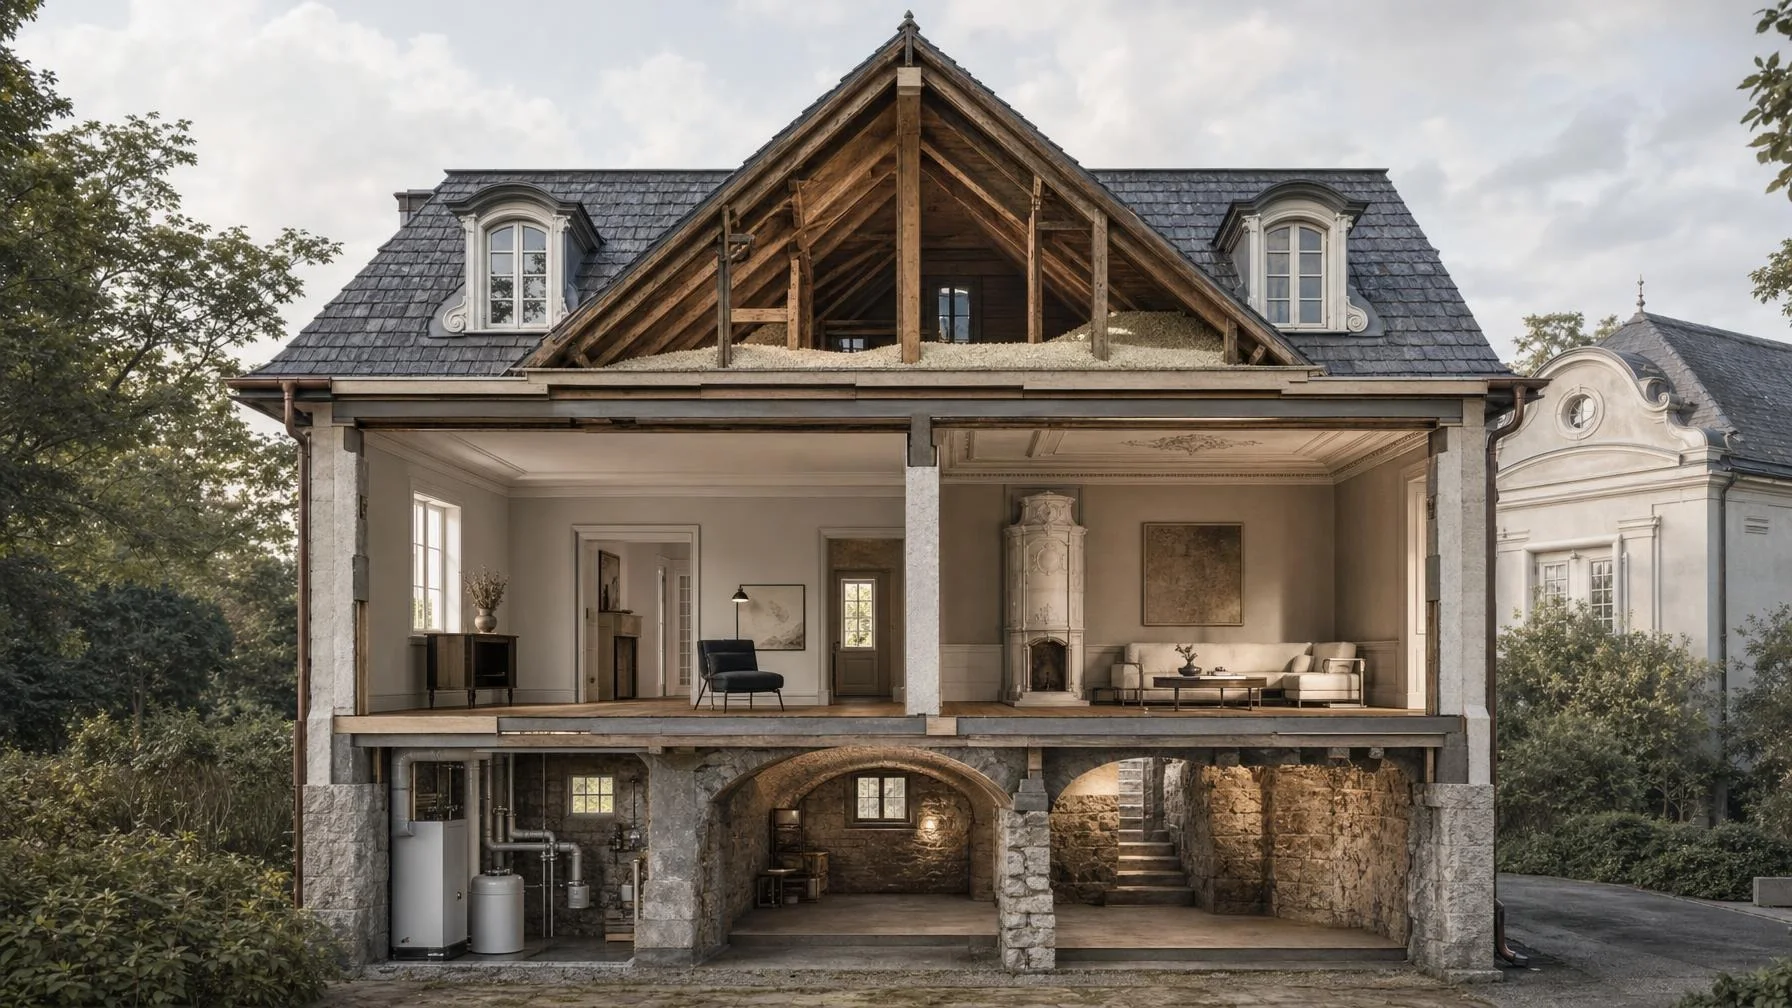
If the attic remains unheated, insulating the top floor slab can be a way to preserve the building’s structure. If the attic space is to be used, moisture protection, airtightness, and connections must be planned in detail. Installations should interfere as little as possible with the historic structure.
In the basement, not every cool surface poses an insulation problem. First, sources of moisture, connections to the surrounding terrain, and drainage must be addressed. If the primary goal is to make the ground-floor floor more comfortable, a measure involving the basement ceiling may be more appropriate than a comprehensive basement renovation. Pipes, vaulted ceilings, room height, and historic surfaces determine the design.
Building Systems, Indoor Climate, and Implementation
8. Design the heating system for the planned final configuration
Have the heating load calculated on a room-by-room basis for the optimized final state. The capacity installed to date is not a reliable benchmark. An oversized system may cycle improperly and operate inefficiently. Therefore, also check the heating surfaces, piping network, control system, and hydraulic distribution.
When it comes to heat pumps, the choice of equipment isn’t the only deciding factor. Buildings and heat transfer systems must be capable of operating at appropriate system temperatures. To achieve this, larger radiators, additional heating surfaces, or underfloor heating in areas that need to be renovated anyway are options to consider. Historic parquet, plank, and natural stone floors require particularly careful evaluation.
Renewable energy systems must also be evaluated on a case-by-case basis. Photovoltaic systems installed on a roof surface visible from a distance may clash with the building’s appearance. Less exposed roof areas or ancillary facilities may be more suitable, provided that permits, shading, structural integrity, and wiring allow for it. A technical solution is only viable if it is compatible with the building in terms of design, building physics, and operation.
9. Planning Indoor Climate and Comfort Together
Comfort isn't determined solely by a higher air temperature. Cold surfaces, drafts, dry indoor air, system noise, and large temperature differences all influence how we perceive comfort. Therefore, define different target conditions for living spaces, sleeping areas, bathrooms, and rarely used rooms.
The ventilation design must take into account building occupancy, windows, moisture accumulation, and airtightness. Centralized systems require space for ducts and shafts. Decentralized units may alter facades or interior surfaces. In both cases, sound insulation, access for maintenance, and the visibility of technical components must be considered.
Sensors for temperature, relative humidity, and, if necessary, carbon dioxide can support subsequent operation. However, they are no substitute for a well-designed structure or a properly coordinated ventilation and heating system.
10. Phase in measures and demonstrate quality
Organize the work according to its dependencies. First, address structural damage and the causes of moisture. Next, carry out work on the building envelope and prepare the utility routes. The building services systems should be designed to meet the agreed-upon final specifications. Restoration work on surfaces should not begin until work involving heavy dirt and moisture has been completed.
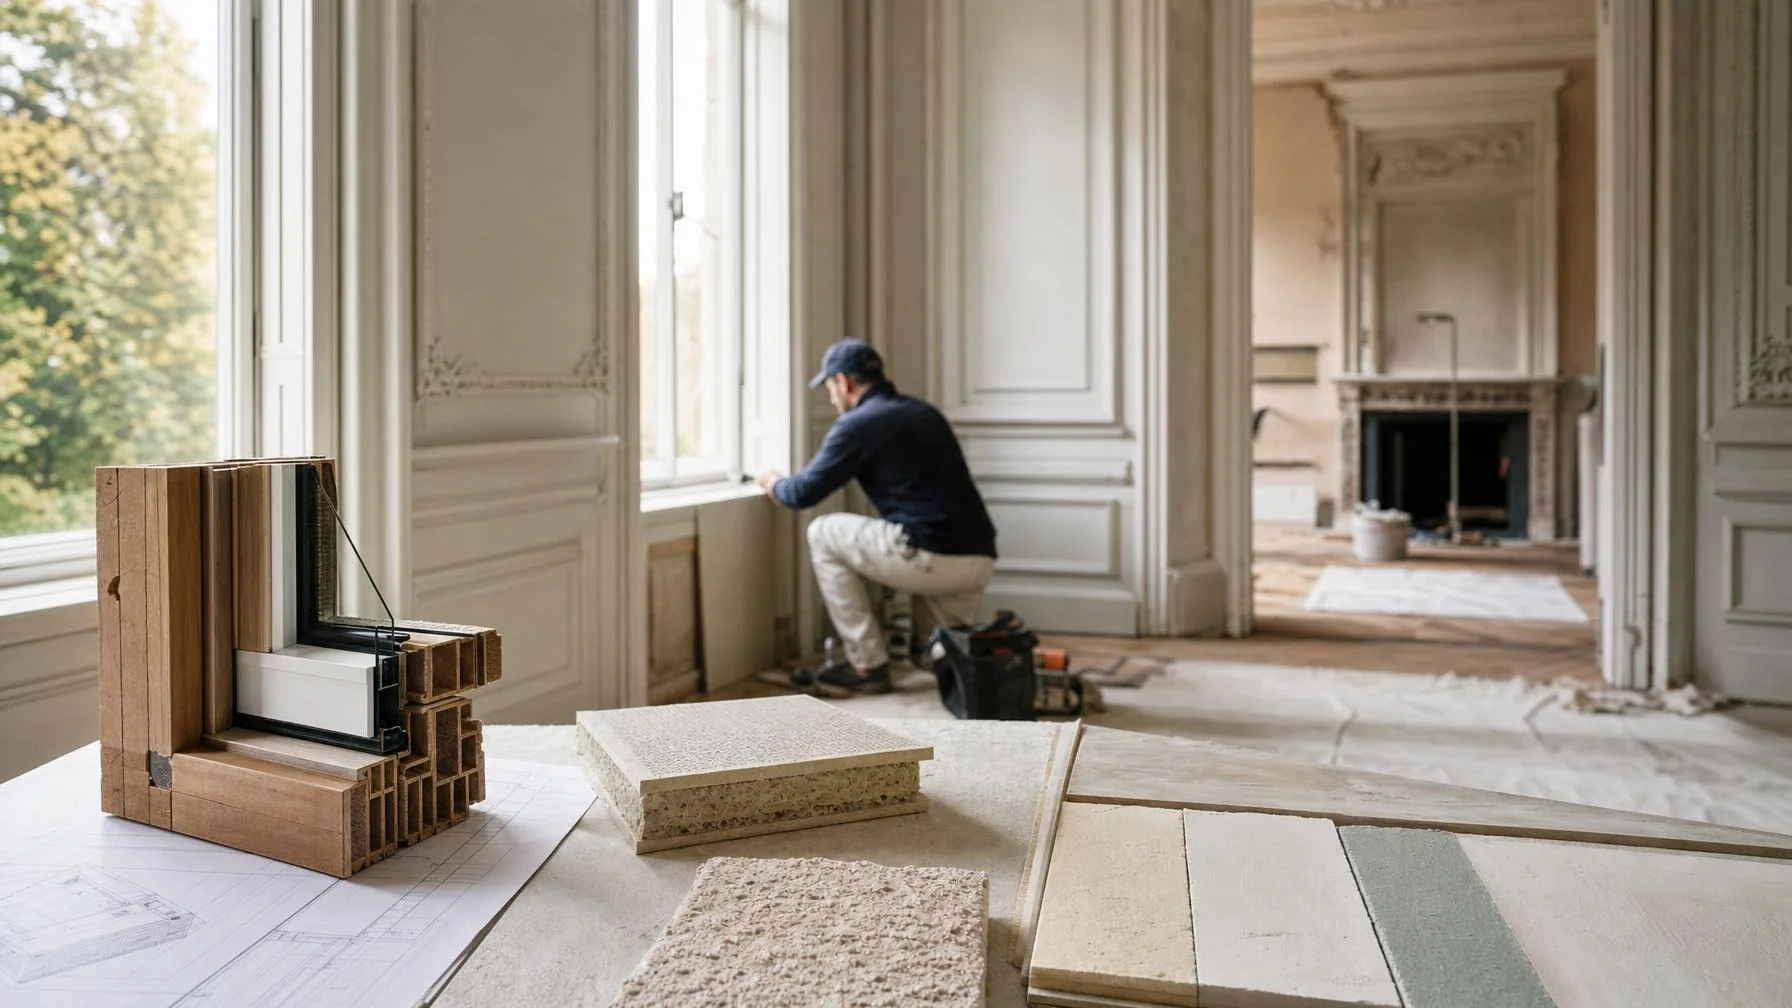
Before construction begins, define samples, approvals, and inspection points. Examples of useful items include a sample window, an interior insulation detail, or a test area for plaster and paint. Concealed wiring and connections should be documented with photographs.
Once installation is complete, the system will be calibrated, tested for proper function, and users will receive clear instructions. Monitoring the system over an entire heating season can reveal whether the control settings and user profiles need to be adjusted. However, no general promises of savings can be made based on this.
A Concise Checklist for Project Preparation
- Clarify in writing the historic preservation status, relationship to the surrounding complex, and the approval process.
- Document historical architectural elements, surfaces, and spatial sequences.
- Prioritize usage, comfort goals, and elements worthy of protection.
- Hire a single firm to handle architecture, energy consulting, building physics, and building services engineering.
- Investigate the causes of moisture and any resulting damage before installing insulation.
- Evaluate windows individually and compare repair options.
- Plan the roof, facade, basement, and building services as an integrated system.
- Calculate the heating load and appropriate system temperatures on a room-by-room basis.
- Check renewable energy projects for visibility, structural integrity, and permits.
- Verify the current legal situation, eligibility requirements, and application deadlines.
- Agree on sample areas, construction documentation, and quality controls.
- Plan for maintenance, operation, and monitoring early on.
Conclusion: Value retention results from well-coordinated decisions
Modernizing a historic villa to improve its energy efficiency means consciously addressing conflicting goals. Maximum insulation thicknesses, completely new windows, or a specific heating system are not automatically the best solution. What matters most is the combination that the building can withstand from a structural standpoint, that is eligible for approval, and that preserves its architectural identity.
Careful planning also lays a solid foundation for comfort, operational efficiency, and long-term value retention. Property owners and prospective buyers in Munich or the surrounding area may also wish to consider a professional real estate appraisal. Upon request, Bayern Sotheby’s International Realty can assist with a discreet, market-based assessment of historic villas. Technical renovation planning should continue to be entrusted to appropriately qualified architects, energy consultants, and specialist planners.